This Sunday, my mother turned 90! NINETY! Can you imagine?
It’s hard for me to imagine since my mom is still the strongest person I know. I am so grateful for her continuous presence in my life. We actually have become closer to each other during the last 10 years than ever before, and it is an amazing feeling, especially given that my mother is a person who is always right. It just happens – she is. It was never easy, but by now I’ve learned to appreciate her wisdom, and character.
In any case, just a few days before her birthday, we decided (or more like I persuaded her figuring that I simply must make it myself under her guidance) to make real teyglach – the way she learned it from my grandmother, Surah bat Leizer z’l. You see, one can find multiple recipes of teyglach, and we have a few in the old book of Jewish food that we have. However, the real teyglach are SO MUCH BETTER!
It is a lot of work though, so it pays to make a lot since you are already investing all this effort.
Here it step by step. The measurements are very approximate and are written within the recipe, so please read first:
Eggs – 7 ( beat slightly)
Vodka/brandy – 4-5 tbsp – no water!
Flour – I can’t even say how much – maybe around 5 cups, but start with 2-3 cups of regular flour, and feel the dough. It has to be soft, not hard, so as little flour as possible. Make it in a big bowl, and once you see it come together nicely in a ball, but pliable, leave it to rest for an hour or two. You can add a tiny amount of baking soda with lemon juice in it, but you don’t have to – they can expand too much if you do.


Make sure you prepare an ample space for you to roll and cut (super clean wooden table is the best unless you have a huge wooden board) the dough.
Cut pieces of dough and roll them into the very thin long strips. Place the strips on a wooden board to dry with as minimum flour as possible. While you are rolling the rest of the dough, the strips that are on the board already will dry out a little.
Once all the dough is rolled, carefully turn the strips that were drying making sure they are not sticking to the board.
The trick here is to watch all the time that you are not using too much flour while at the same time making sure that the dough doesn’t stick.
Give the strips some more time to dry out before you start cutting.
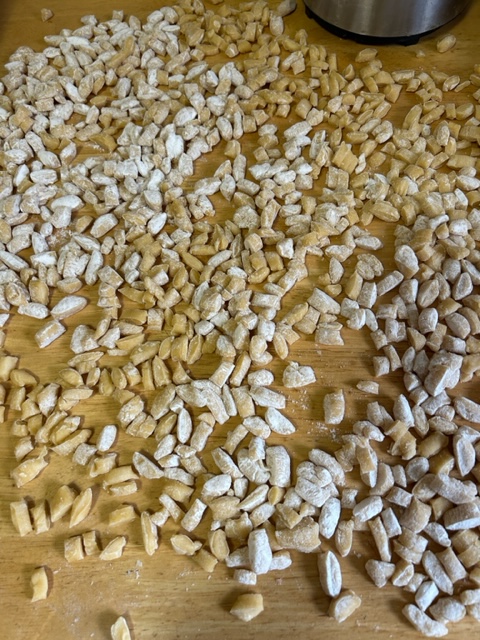
Cutting is important! You have to cut the strips into tiny, tiny pieces, literally not bigger than your pinky nail, or better yet – the half of it. While you are cutting, try to move your knife the way that the little pillows of dough will scatter as far away as possible from each other, so that they do not stick to each other. You can scatter some flour, but again, not a lot on the surface of your table or board where your dough pillows are.
Once all the dough is cut, prepare the biggest pot you have and heat a generous amount of oil in it. You can use a blend of sunflower/olive oils. Check the right temperature of the oil by dropping a couple of dough pillows in it. If they start bubbling and/or surfacing, your oil is ready.
Drop about 2-3 handfuls of the dough into the hot oil, and fry stirring a couple of times for a few minutes until they turn very slightly golden on both sides. Fish them out with a big slotted spoon trying to get off as much oil as possible and dump into a big bowl.
Work your way through all of the dough, and clean (not wash, but just clean with a cloth after pouring the oil out) the pot.
Put all the dough back into the pot, and add about 1 cup of honey. Turn the heat to low. You might need more depending on how much dough you end up with. Stir the dough pieces with honey to see if you need more. The honey should be absorbed into all of the dough. Make sure the mass doesn’t stick, so stir often. Once you see that all the dough has absorbed a bit of honey, add about half a cup of chopped nuts. You can use both walnuts and almonds, or even better a mixture of both. Add some sugar – about 2-3 tablespoons. This will help the pieces to stick together at the end.
Prepare a big wooden board or a couple of those as well as a bowl of cold water.
Put more chopped nuts on the board, or alternatively, pour some cold water on the board.
Dump the dough pieces on the board, and immediately (dipping your hands in cold water to prevent them from burning) spread out the dough pieces evenly pushing into the board, so that the pieces stick together.
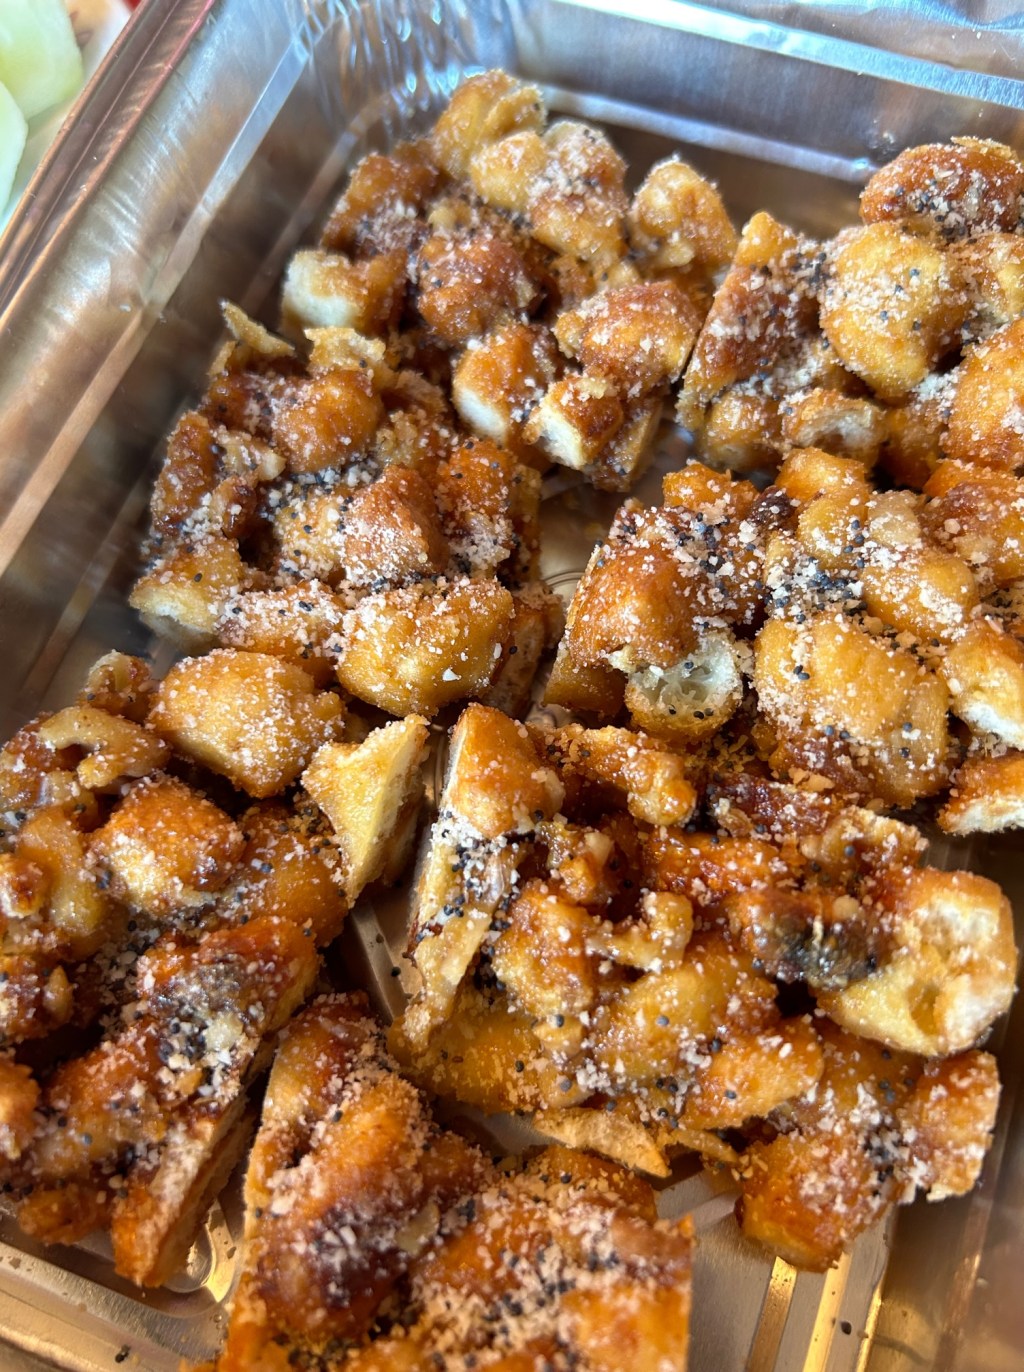
Finally, sprinkle with a mix of chopped nuts, sugar and poppy seeds.
Leave for a few hours to make sure everything sticks together and cut onto nice-size pieces that you can just take with your hand and eat as soon you feel that you deserve this special treat for working so hard.

Leave a comment